今、多くの人が好きなのは Googleスライド Microsoft PowerPointよりも。Googleスライドでは、無料で美しいプレゼンテーションを作成することができますので、任意のサブスクリプション料金を支払う必要はありません。
あなたが画像やテキストボックスの不透明度を変更する方法を知りたい場合は、この記事はあなたのためです。このガイドでは、Googleスライドで不透明度を変更する最も簡単な方法を学びます。
目次
画像の不透明度を調整するには?
- まず、不透明度を変更したい画像を選択し、ツールバーの "書式オプション "を選択します。"書式オプション "オプションが表示されない場合は、"書式 "オプションを選択し、"書式オプション "を選択した後、上部メニューに表示されます。
- Now, a side panel will be opened. Find the “Adjustments” option; it is on the 4th number. When you click on it, on the first number, you will find a slider for opacity.


図形の不透明度を調整する方法?
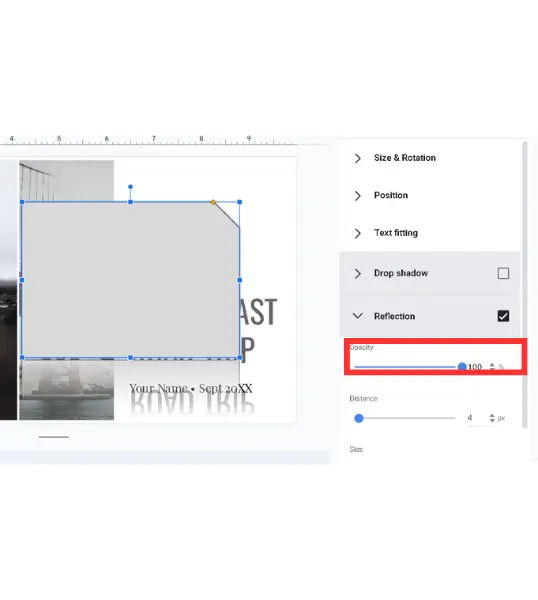
For shapes, it’s even easier. To adjust a shape’s opacity, you’ll need to choose the reflection setting first. Please check the image below to see if you are selecting the right option or not –
どのように テキストボックスの不透明度を調整する?
Let me tell you teh process of adjusting teh opacity of the texts in Google Slides is as easy as the images. Follow the same steps you followed to change the opacity of shapes. Just go to the reflection tab and change the opacity according to your needs.
Common Mistakes to Avoid That You Should Avoid
文字がかすれすぎてはいけない。そうすれば、読者はそれを読むことができなくなり、何のためにプレゼンテーションをするのか?
透明なオブジェクトを重ねるときは、きちんと重ねる。
最終ノート
以上、Googleスライドの不透明度の変更についてでした。他のトピックに関するガイドが必要な場合は、私たちに連絡してください、私たちは12時間以内にそのトピックに関するガイドをアップロードします。
よくある質問
Can I use shortcut to change opacity in Google Slides?
いいえ、今のところキーボードショートカットはありません。ガイドで説明したように、手動で不透明度を調整する必要があります。
背景画像の最適な不透明度は?
デザインにもよりますが、一般的には50~70%が背景には適しています。
テキストだけの不透明度を調整するには?
フォーマットオプションの反射オプションで調整すればいい。