If you want to protect your data in Google Sheets, then locking cells is a good option. Apart from that, locking cells can also help you in preventing any accidental changes while working in other cells. If you want to share your documents and don’t want others to edit the cells, then you can lock the cells.
Let’s look at how you can lock cells and why it’s useful.
Table of Contents
What Does Locking Cells Do?
The locking cell feature prevents others from changing the data in those cells that you have locked. After you lock a cell, you can ensure that only specific people can edit it, but other persons with whom you shared the document can view it but not change the data.
When to Use Cell Locking?
You can use cell locking if you’re working on a shared document. This helps avoid mistakes and ensures that important information remains accurate.
Steps to Lock Cells in Google Sheets
- First, you have to select the cells. To do so, you have to press the control button(Ctrl), and simultaneously you have to click on the cell that you want to lock.
- After selecting the cells>select the Data option.
- From the drop-down menu, choose Protect Sheets and Ranges. This opens a sidebar where you can set your protection settings.
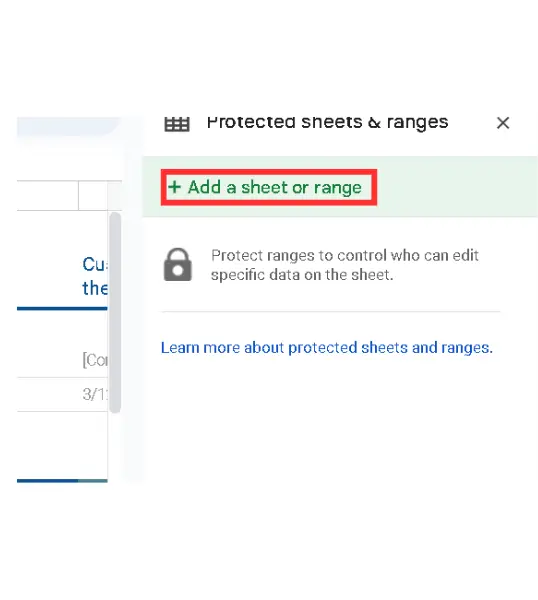
- If you have not locked any cells before, you will see an option named Add a sheet or range, select it.
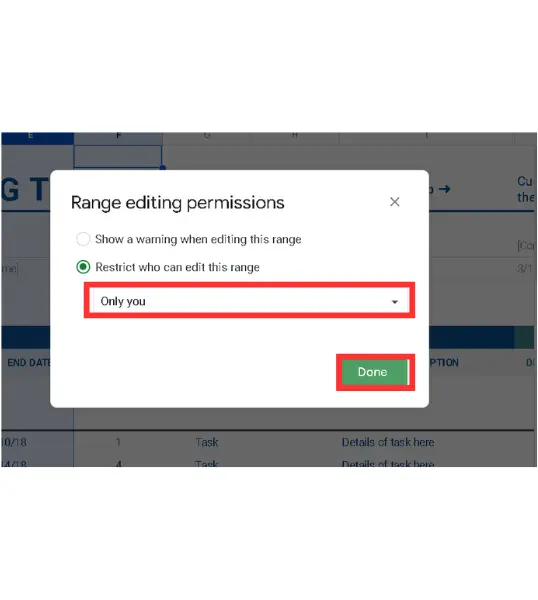
- Then, you’ll see options to set permissions. You can choose who can edit the cells or set the sheet to be view-only for everyone else, and in the who can edit this range option, set it to “Only You”.
- Now, except you, no one can change the data in those cells that you have selected before setting up the permission.
Can You Unlock Cells Later?
Absolutely! Locking cells isn’t permanent. If you need to unlock the cells, you can easily unlock them by following the same process with some extra steps.
How to Unlock Cells in Google Sheets?
To unlock cells, simply go back to the Data menu, select Protected Sheets and Ranges, and then click on the range you want to unlock. From there, you can either adjust the permissions or remove the protection entirely.
Final Notes
If you usually share your sheets with other persons, then Locking cells in Google Sheets is a great way to keep your data secure. It prevents others from editing the content of those cells.
If you have followed the above guide correctly, you will not face any problems in locking cells in Google Sheets.
FAQs
Can You lock only specific rows or columns?
Yes, you can. To do so, select the rows that you want to lock before setting up the protection.
Can You set different permissions for different cells?
Yes, you can set different permissions for different cells or ranges.
Will locking cells affect formulas?
No, locking cells does not change formulas; it only prevents others from editing them.
Can locked cells still be viewed by others?
Yes, others can still view locked cells, but they won’t be able to make any changes.